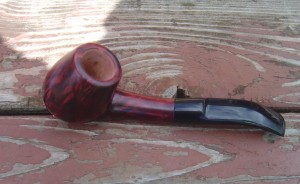
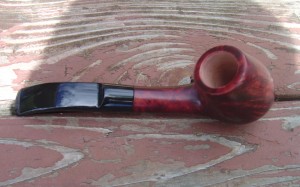
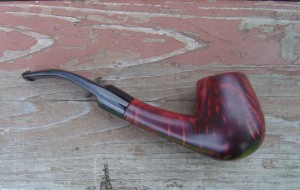
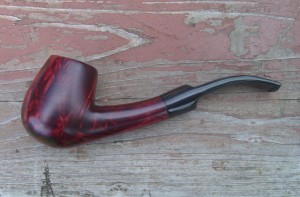
I thought I’d start off the first project with something I just finished up this last weekend. This project has been spread over 4 weekends (I work slow), so forgive the extra-long post.
I really enjoy smoking cigars on the patio during the summer months. But this year, instead of cigars, I wanted to try pipe smoking (I’m a old man at heart). Going out to buy a pipe could cost $60-100 for a decent starter pipe. Instead, I wanted to make my own.
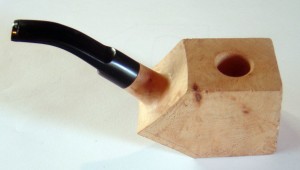 I bought a kit from eBay. Basically the kit was pre-bored briar. The tobacco chamber and smoke chamber are pre-drilled. The stem is fitted with a tight tenon. This way I can focus on shaping the pipe instead of worrying about the mechanics. The kit only cost me $25 plus shipping. Not bad.
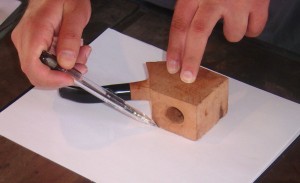 I started off tracing the briar block and made some sketches of the shape I wanted and to get the proportions correct. When I found a drawing I liked, I used spray-mount to glue it to a cereal box. I cut the template out and traced it onto the block of briar.
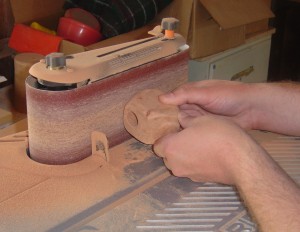
I used a band saw to chunk it out then it was off to the sander. I’m using a Rigid oscillating belt/spindle sander to get the pipe to the rough shape. I used the belt sander first to get the bottom curve where I needed it, then switched to the spindle sander to start rounding the bowl. This worked pretty well, but it was hard to get into the tight areas.
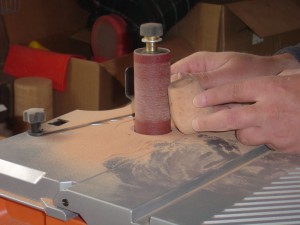
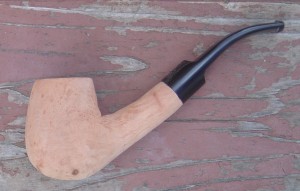 When the shape was pretty close, I switched to a dremel tool. I used both sanding drums and burr cutters to finesse the shape. I found the burr cutters were too aggressive and can get away from you. But the sanding drums worked great.Unfortunately, I got carried away on the shank and the line between the stem and the shank got a bit wonkey. Lucky for me, I was able to fix this transition by sanding the acrylic stem along with the shank.
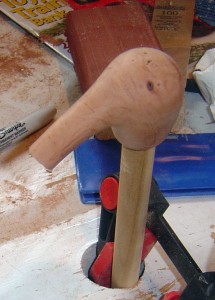 Now its time to put away the power tools and start doing things the old fashioned way. I used some jeweler’s files I got at a hobby store to get into the tight areas. These were great, especially in the transition areas between the shank and the stummel (bowl). The goal is to get everything to flow and remove the facets the power tools created. I used a lot of 80 grit sandpaper to smooth everything out. I found that if I cut the sandpaper in 1/2″ strips, I could fold a small piece over and work the sandpaper with my fingertips. Then when the sandpaper needed refreshing, I folded over the next section and and continued.
Did I mention it was a lot of sanding? I went through the grits 100, 220, 320, 400, 600 grit. I was pretty impressed how smooth you can get this briar. By the time I got to 600 grit, it felt like plastic. The birds-eyes looked great and the flames were really cool too.
Time to add some finishing. For this, I used dye dissolved in denatured alcohol. This seems to be the finish of choice (many actually use leather dye) by pipe-makers. Probably because other types of stains will affect the tobacco flavor.
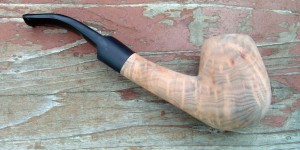
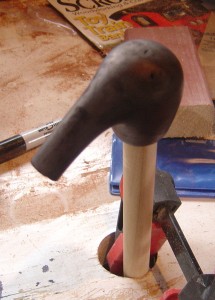 I wanted to pop the grain. I was reading in the forums that some people will dye the pipe black or dark brown. Then they’ll go back and sand away most of the color. This way, the dye remains goes deep into the grain (softer wood), but won’t penetrate very far in the harder areas. So I gave it a try. I must have added too much dye or something, because it was a bugger to sand it down again. I tried with 600 grit, but made very little progress. I continued moving down the grits until I got to 320 which seemed to do the job OK. Once I got the grain to where I was somewhat happy (I’m sick and tired of sanding at this point), I moved up the grits again to 600 grit.
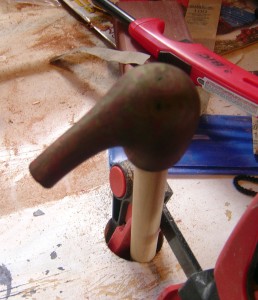 After I got my pipe back to a smooth finish, I added a cherry dye to the entire pipe. This dye was blood red, which looked kinda cool. But I wanted a deeper brownish red color. So I mixed a little brown mahogany dye with some red and gave it another coat. This time it was too brown. So I went back to the red one more time for another coat. It looked pretty good.
When dying wood with alcohol based dyes, many pipe-makers will light the pipe on fire to evaporate the alcohol more quickly so they can move on to the next step. Being a guy who likes to set things on fire whenever possible, I gave it a try. One word….Awesome! It leaves a slight greenish tint to the surface, but that buffs off easily and doesn’t affect the color.
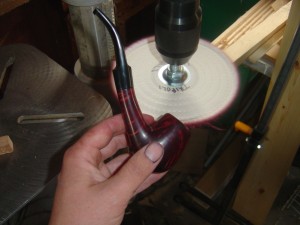 On to buffing! I ordered some wheels online and used my drill press. I’ve never used a buffing system before, so this is all new. It’s almost magical what those buffing wheels can do! The first compound was Tripoli. Then I followed up with white diamond. These two were the ultra-fine sanding (to my understanding) and doesn’t really offer protection. The protection comes from the Carnauba wax. This is a very hard wax that protects the finish, but allows the briar to “breath.” I finished by buffing with a flannel buff with no compounds. This really gave it a nice shine.
There you have it. That’s how I carved my first pipe. Its far from perfect, but it was an immensely fun and a satisfying project. I love the grain and the deep Merlot color. I’m looking forward to carving my next pipe.
Next time I carve a pipe, I’ll probably do a few things differently. First, I’d like to get a sanding disk and mount it to my lathe. Many pipe makers use this to shape their pipes and I can certainly see why. It would make shaping so much easier than with the spindle sander. I’d also use the dremel drum sanders much more for the finesse work. I’d also use the buffers on the lathe as well. Since each buffing compound needs a different speed, it would be much easier to dial the lathe speed rather than changing belts on the drill press. As far as finishing, I’d set the alcohol dye on fire much more often. 😀
If you’re interested in carving your own pipe, here’s a few resources you might enjoy:
- Wood Deals Online – Find briar and pipe-making kits.
- Pipepedia – A wiki about pipe smoking and pipe making. Lots of good info.
- Pipe Maker’s Forum – A community of pipe-makers. Great info, amazing talent.
- PIMO – The only book about pipe-making. A bit dated, but good info. Also a lot of supplies.
- Flieger671 YouTube Channel – He has a series of Pipe Carving School videos.
Oh, in case you’re wondering, the pipe smoked great!

