 My next tool in my home brewing arsenal is a wort chiller. Since I’ve stepped up to a full wort boil, ice baths just won’t cut it anymore. I need a way to cool down my wort quickly. I could buy a commercial wort chiller, but a quick trip to the big box store will only cost you about $32. The wort chiller is very easy to make. Here’s what you need:
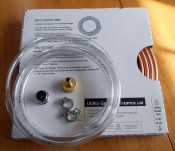
- 20 ft. of 3/8″ OD Copper Coil
- 10 ft. 3/8″ ID Vinyl Tubing
- #4 Hose Clamp (2)
- 3/4 FH x 3/8 Barb – Hose Barb Adapter (Female water hose connection)
- Faucet to Garden Hose adapter (optional)
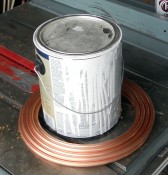 Working with copper coil is tricky. It kinks very easy. Fortunately, the copper coil comes in a box already coiled. This makes it much easier to coil around a round object without kinking it. You’ll need to find a round form to wrap your coil around. The form must be small enough so that it fits easily in your brew pot. I used an old paint can for mine.
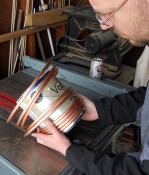 Put the form in the middle of the copper coil. Starting from the bottom, hold the end and start pressing the coil against the form. Twist the form as you work your way up. You’ll end up with a nice tight coil around your form.
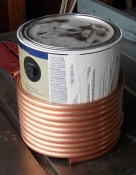 From here, we need to bring each end up for the water inlet and outlet. Many commercial wort chillers have the bottom edge going through the center of the coil. You’re just asking for trouble trying to do this. I found I got some really bad kinks, plus its difficult to work in that area. Save yourself some headache, go on the outside. It really doesn’t make any difference going through the center or the outside of the coil.
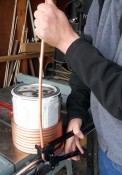 I used a copper coil bending tool to make my bends. I’d recommend using one. Again, its really easy to kink the coil. These tools equalize the pressure along the coil and make smooth bends. I don’t think I used the tool I had very well as the bends aren’t as pretty as I had hoped, but at least it didn’t kink it.
  Make sure the bottom is long enough to clear the top of your brew pot. I also made a little s-hook on the end of the coil. I mostly did this in case there’s a leak at the connection. This way water doesn’t drip into your brew pot. Instead, it’ll run down the hose and safely away from your beer. Lucky for me, the connection was very tight and didn’t have that problem. Stretch out the coils a bit. I used a small zip tie at the top to hold the inlet/outlet together.
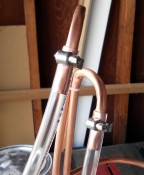 The hose connection couldn’t be easier. First I cut the hose into 2 equal 5 foot sections. Then, I slipped the 3/8″ tubing right over the end of the coil. Then I used a a #4 hose clamp to really seal the deal. The clamp makes a tight seal, and prevents the tube from coming off if the water pressure is too high.
The garden hose adapter was just as easy. Just slip the tubing over the barbed end, and you’re done. The barbed end makes a tight seal, so there’s no need for a hose clamp. If you need the added versatility of connecting to a kitchen sink, you can buy a faucet-to-garden hose adapter for your faucet.
For the last 10 minutes of the boil, insert your wort chiller into the boiling wort. This will sterilize the wort chiller. When you’re ready to cool, hook up your garden hose to the wort chiller, turn on the water and watch the temperature drop! I think my temps dropped to pitching temp within 15 minutes (we have cold ground water). I couldn’t be happier with this DIY project.
Be sure to check out my buddy’s wort chiller project at Making Home Brew. He also has very good instructions with lots of pictures.


